Powered by Blogger.

I'm Moving!!!

First, I want to apologize for being so neglectful with my hybrid projects. I think I got too excited by the idea, not realizing the time that would go into this. I should have started a project like this several months ago, instead of coming up with the idea 4 days before the first of July and trying to pull it off. That pretty much describes my life--just ask my poor hubby!

So, I'm still going to be working on all these projects and post as I go, but they may not all come in the month of July.

Now for my news of moving. Several months ago, I had an idea come to mind for the perfect design name. Of course, that inspiration didn't come a year and a half ago when I tried and tried to come up with something that fit me! And I've gone back and forth on whether or not I should change my design name. I'm just feeling like people are starting to know me and recognize me in the digiworld, so I was hesitant to change things around. Well, after much thinking, I have decided to make the switch. I have also decided to start fresh with a whole new blog and blog address that goes with my new name!

Here is my new address.

Ramona the Pest

Please come visit me here and I promise to reward you all! I have a great freebie that everyone can earn! I will still have all the fun things continue over there, the LDS freebies on Mondays, hybrid projects as I finish them and then random freebies to go with my new releases. I also plan on journaling more and sharing small tidbits from my somewhat crazy, but boring life! LOL!

Read more...

Kindred Spirit

I'm so excited about my new kit this week! I had so much fun creating it! I also put together a little quickpage for you all, as well!


Here is the quickpage for you!


Download Here

The kit is on sale for the first week for only $2.25!! Click HERE to pick up the kit!

Read more...

Monday's Freebie

I have to apologize this week. I don't have an LDS freebie done for you all this week. Today was my hubby's birthday and we spent the day together as a family! Also with the holiday weekend, I've fallen a bit behind! I promise to have an addition to last week's paper pack by next monday! I will also be posting my next hybrid project tomorrow! It's very cute. I'm just putting the final touches on it and then I can post about it!

I have a couple of things to show you tonight though, so at least it won't be a complete waste!

First of all, I had a new kit released this last week for the 4th of July weekend.


I also have a CU Grab Bag for sale for the month of July! I am going to reveal it for this week only, so snag it quick! It is worth about $20.00 of CU products all for the low price of $5.00

Photobucket


Photobucket


Photobucket


Photobucket


Photobucket


Click HERE to go to my shop and buy it!

The last thing I have is to tell you about a carnival going on at DigiTown Square. This looks like such a fun opportunity! Plus, Brownie Scraps is one of the sponsors, so play along and you might win a prize from our store!!

Photobucket

Read more...

Explosion Box

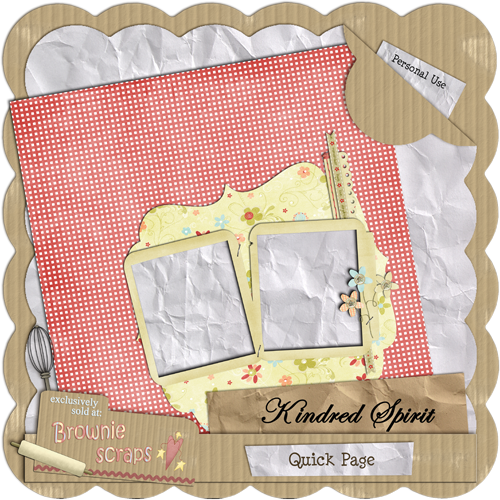
The first hybrid project I'm going to post is an explosion box. I found the instructions for a paper-scrapped one on several different sites. Then I just modified it to create my own! The quickpages that I used for mine are available as part of our July Collab at Brownie Scraps, and it's FREE with any purchase over $10.00. However, you can do this with papers or create your own quickpages.

The first thing I did was to slip my pictures into the quickpages. I decided to make this little box to give to both sets of grandparents who are coming this weekend for my son's baby blessing. He is my sixth baby and I wanted to do something a little special for them to remember! Plus, my mom lives quite a ways away and misses all her grandkids, but especially the new baby!

After putting the pictures in, I slid them on to a 12x12, 300 dpi screen so that I could print from there. Here is what they looked like when they were ready to send off for printing.

PhotobucketPhotobucket

If you were going to print these at home on a regular printer, you would just put them on an 81/2 x 11 sheet, as many as will fit. As you can see, some are different sizes and I just moved them around to fit on the 2 pages. For me, I prefer to send out for printing. I get them done at Simply Scrapping for $1.99 per sheet, so for this project, it cost me $4.00 for all the pictures!

When I got them back, then I cut them out and organized them into the stacks. The outside of the box and the three layers.

Photobucket

Next, I used 4 sheets of matching cardstock. It doesn't have to be extra sturdy or anything because the photo paper helps to strenthen it!

I took the first sheet and cut a 4" square off of each corner of the sheet, so that it looked like this:

Photobucket

On the bottom of it, I put the four pictures. I would suggest that the four pages that go on the outside, that you actually cut 2 inches off the top, so you can attach it to the sides of your lid. I didn't do it this way, but will on my future ones, because I learned that the lid covers up half the picture. So, you can do it either way, but these pictures will show it with the pictures staying in tact.

Photobucket

Then I turned over the sheet and put the stack of four pictures which are the largest in size. They will be the same size as the ones on the outside. These make up the bottom layer:

Photobucket

For the next step, we will make the middle layer of the album/box. Cut 3/4 of an inch off of the top and side of the next piece of cardstock. Then cut out squares from the four corners that are 3.75" x 3.75" each. This will leave four squares around the middle square and they will be for the next layer of photos. I did this box by only doing one side of these last two sheets, but you can do both sides. Just do multiple pictures, journaling whatever, you would like for those.

Place that sheet on top of the one you just finished and glue the bottom square to the other one.

Photobucket

For the final layer, cut 1 1/2 inches off the top and side. Then cut 4 squares out of the corners in the size of 3.5x3.5. Attach the smallest stack of photos to these and glue the bottom of this to the top of the middle layer. Because they are each smaller, it will give you a cascading effect.

Last we're going to do the lid. With the lid, you don't cut anything, just score and fold the edges. Take the last sheet of cardstock and cut it down to an 8x8 inch sheet. Then score 2 inches around all four sides. This will give you a square on each corner. Pinch the corner and fold in and glue. Do this on all 4 sides. Your lid will look like this:

Photobucket

Attach the "Top" photo to this layer:

Photobucket

Fold up the edges of your box and put the lid on. It will hold it in place. You can wrap with ribbon and add any other embellishments you want.

Here it is all done:

Photobucket

Read more...

Christmas in July

Welcome to my very first "Christmas in July" celebration! I truly can't believe we are more than half way to Christmas. I feel like I just put away the tree and decorations! However, I must face reality and I thought what better way to do so than to start now preparing for gifts and goodies for family, friends and neighbors!

I love to scrap! I love everything about scrapping! I also love to share what I scrap! Most of what I do is on the computer, but if it always stays on my hard drive where is the joy in that? So, throughout the month of July I'm going to be posting some different types of hybrid projects that will help you start now preparing for Christmas! I will give ideas and freebies for things like cards, little gifts and tags for neighbor gifts, albums, and other types of gifts. All of these things will combine the wonderful ease of digital with the fun of paper and ribbons and bows!

I will continue to give out my Monday LDS freebies, highlight new product I have for sale in my store, as well as tutorials and free downloads for these fun holiday projects! I hope that you will all enjoy what I have in store and we can work together to prepare now for Christmas, so that when the season does get here (and it will get here!) we can sit back and enjoy it! All of the "work" will have been done!

Read more...

A Stone Rolls Forth

I only have a paper pack for the freebie tonight, because the rest of the kit is in the works, but not completed! I really love where this one is going and it will be amazing when it is all done. I really wanted to go with a heritage type kit that also celebrates the life of Joseph Smith and all the other early pioneers. So, each week throughout July I will have a new installment for this kit.

Also, I have a fun announcement to post about some fun changes at Brownie Scraps, so look for that news below!


Download HERE

Read more...

Hybrid Project--Badge Album

So, I learned a really cute little hybrid album project this past week and thought I would share! I'm going to make more of these for my kids to take to church. It will be so nice for them to look through quietly and they are so sturdy!

For this project, I am using a badge album that Jewel of Mad Genius Designs put together using my "One Summer Day" kit. She is on our CT and was so awesome to introduce me to this fun project!

You can currently pick up the pages of the badge album in our forum HERE for FREE!! Each day we have two more pages of the album to download!

So, the first thing you do is put your pictures in each of the album pieces and then move them onto a 12x12 300 dpi screen. This is the same as putting them on a 12x12 paper. It took two of these for this project! Once I had them all done and on the 2 pages, I sent them off for printing. You could use an 81/2 x 11 paper and print at home, it would just take more of them. So, whatever works for getting them printed. I use "Scrapping Simply" which does amazing work and each 12x12 is only $1.99. They ship just about anywhere and their site is linked here in my blog, if you are interested. (I don't get paid by them for advertising, I just like them so much I thought I would share the info with others).

Oh, one other thing. I would buy your badges first so you know the exact size. I didn't do this and ended up needing to trim mine! I just went to the office supply section of Wal-mart and found the plastic name badge cases. I think I got 12 for $1.68. Not too bad!

Once you have that all done and printed, it will look like this:

Photobucket

The next thing I did was cut them out and slide them in the little covers. I love how thick the plastic covers are. It makes the little album so sturdy! Here is what the project looked like half done:

Photobucket

Once I had them all in place, then I placed to silver binder rings in the top and it's done! I still need to add ribbon to decorate the rings, but you get the idea!

Photobucket

So many fun things to do with this! I'm even thinking this would make a darling ABC album to help my kids learn their ABC's! I hope you enjoy making it. I have a few more hybrid projects in the works, so check back often!

Read more...

About This Blog

Lorem Ipsum

  © Blogger template Shush by Ourblogtemplates.com 2009

Back to TOP